
Paper Wreath {Tutorial}

Today I thought I’d show you this very cute wreath I made using paper and cardboard. It was a fun little project and I received tons of comments on it. I even had a request from Tan’s grandmother that I should make her one as well lol 😉 It was such a fun project and I loved the compliments I received from this wreath that I thought I’d share a “how to” tutorial with you wonderful peeps. Awesome right?
Here’s what you’ll need:
- glue gun and glue
- stapler
- white paper (I used printer paper)
- cardboard
- Christmas ornaments (i used 2 different sizes)
- ribbon (for hanging)
- scissors or exact o knife (to cut the cardboard)
- 10″ plate
- 8″ plate
- 4″ bowl
Other helpful tools
- pencil
- sharpie/marker
- hole puncher
I’ve seen wreaths similar to mine made using newspaper or and old used book. Since I wanted to create a “White Christmas” theme this year I nixed the idea of using newspapers and I didn’t have the heart to destroy a perfectly good book. Especially this time of year, where there are plenty of people that could use a good book, especially one that’s been well loved!
I had some left over white paper I bought a few years back when Office Max from my neighborhood was going out of business and got them for a steal! I had about 4-5 reams lefts, plenty to use for my project! So the first thing I did was fold and tear the papers in half. I did this to about 60 pages, which doubled them to 120.

After I was done tearing the pages in half I then rolled them into cone shapes and secured them with tape. I used regular tape but if you prefer for the tape not to show I suggest using double sided tape and adhering it to the inside of the cone. I ran out of double sided tape so regular tape it was! 😉

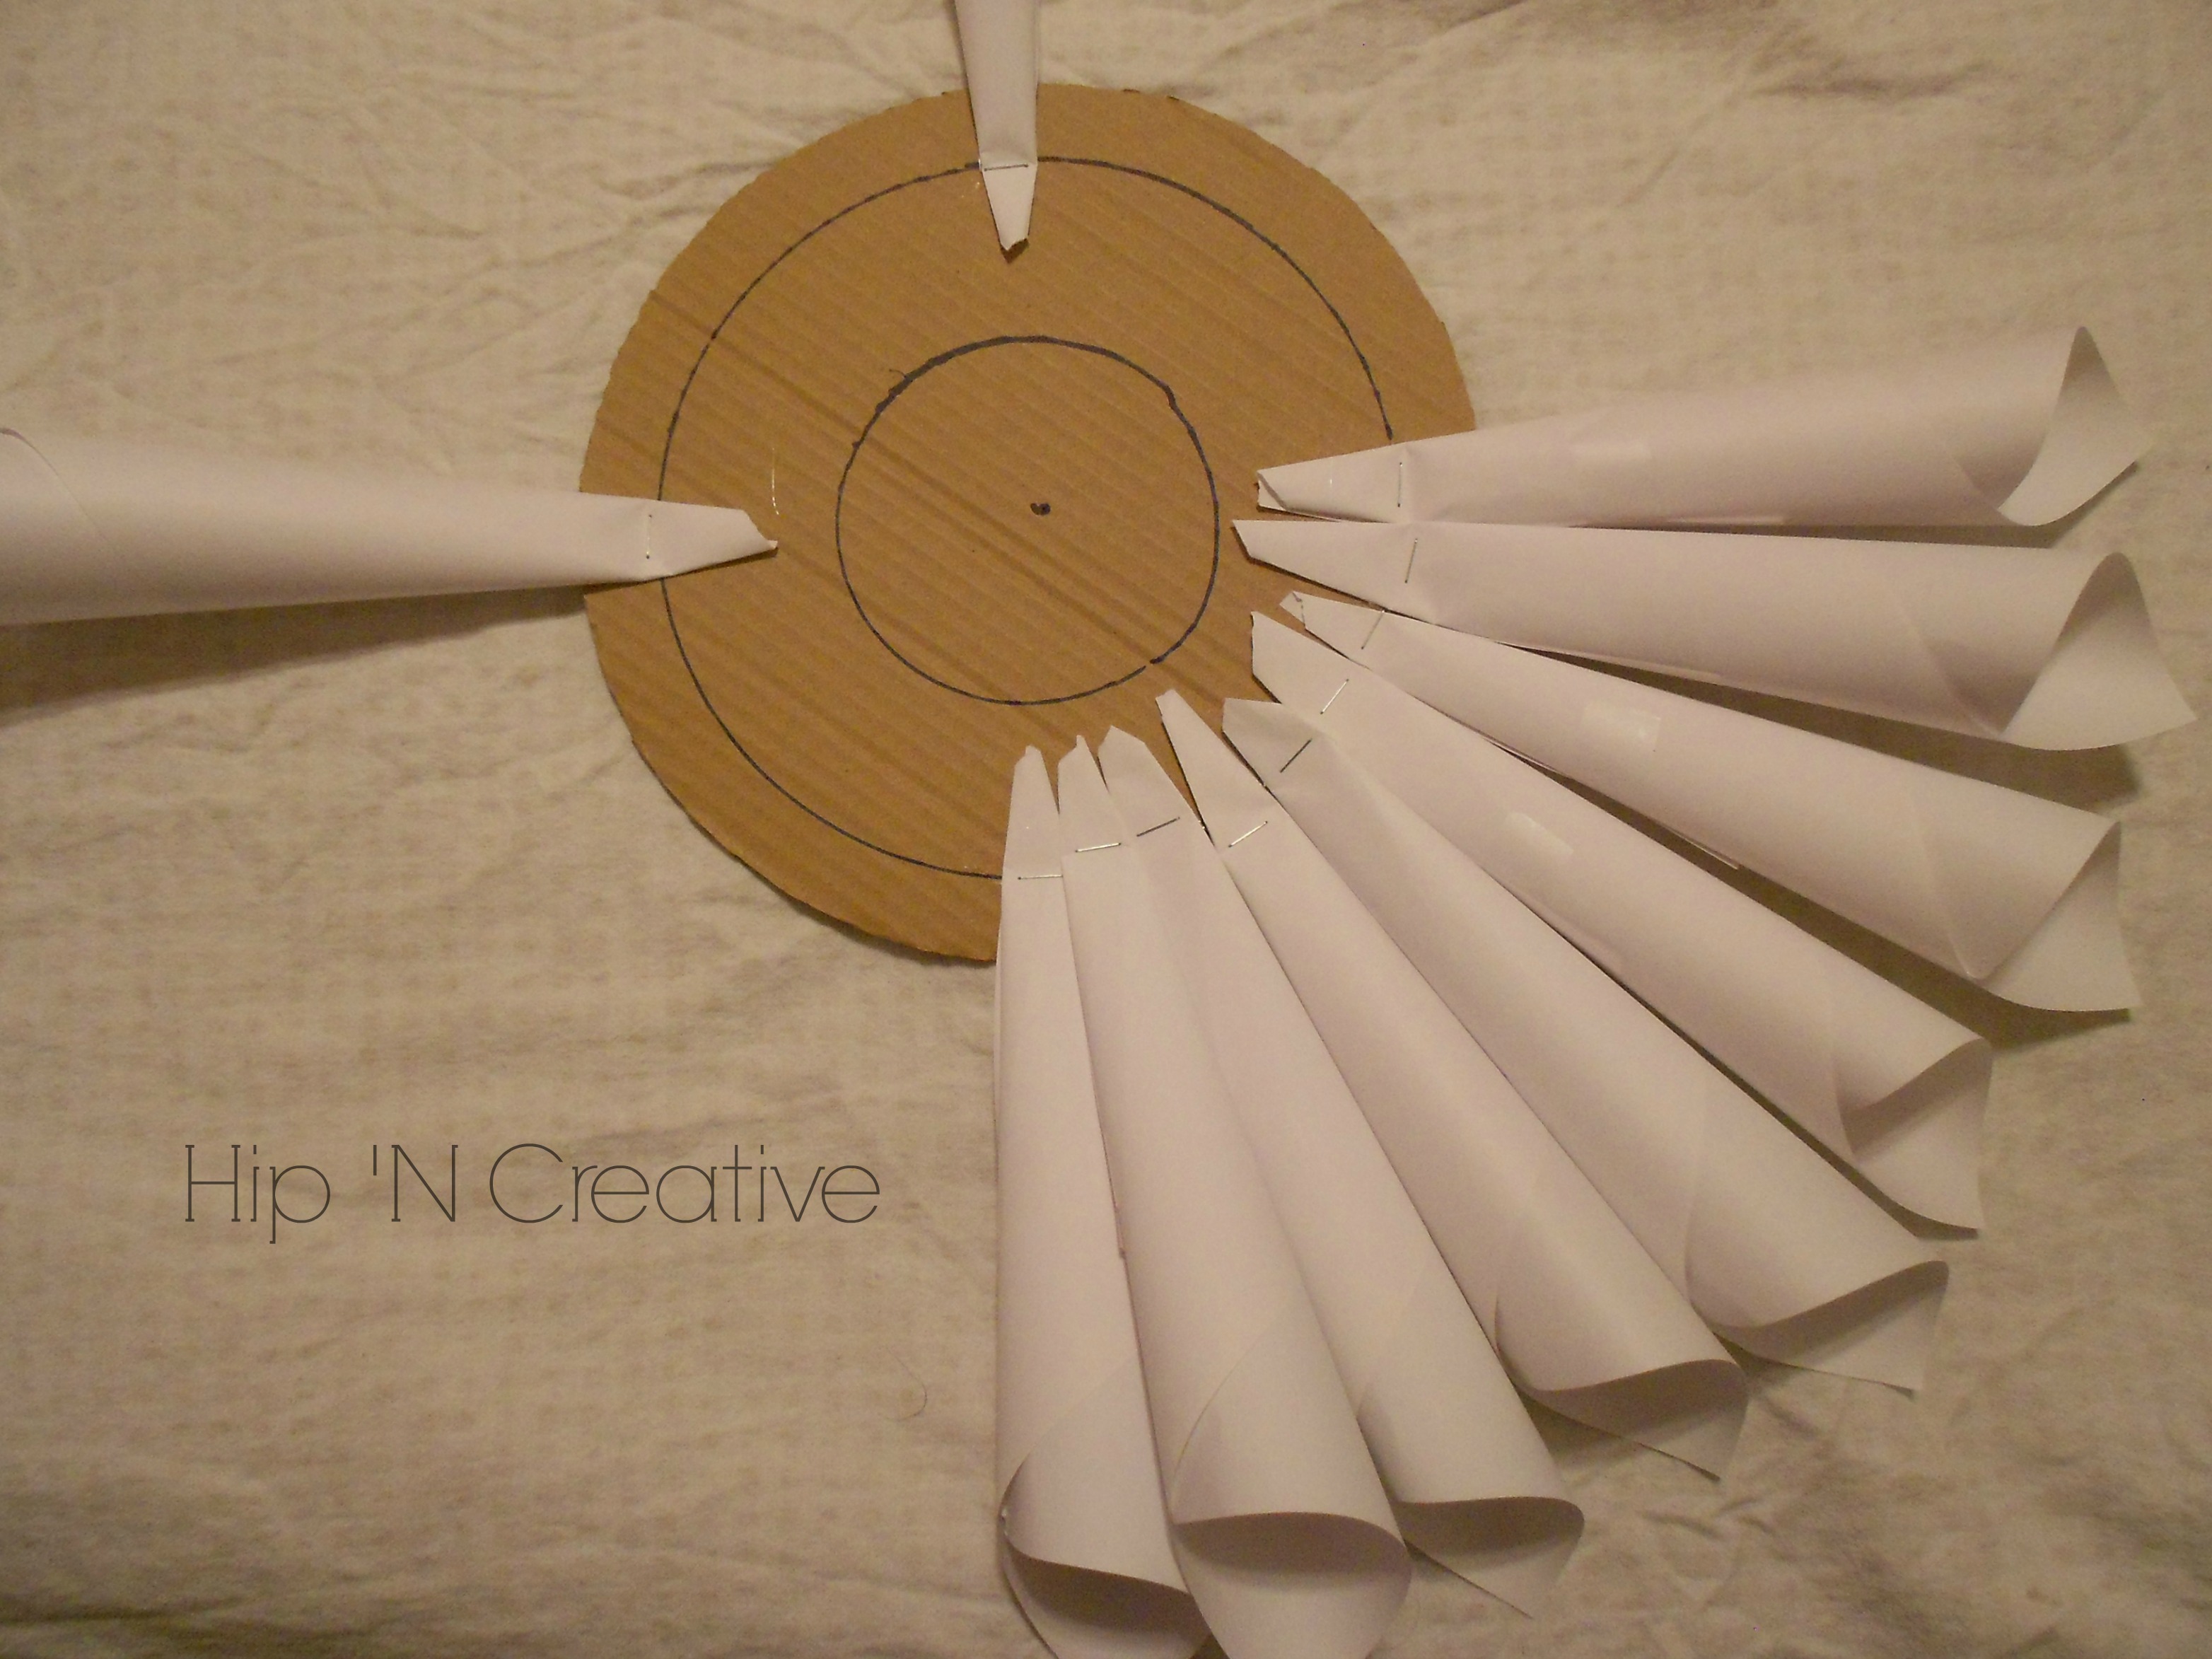
Once I was done rolling and taping, I stapled each cone about an inch from the bottom tip of the cone. When I was done with all 120 cones, I set them to the side and started working on my wreath template.
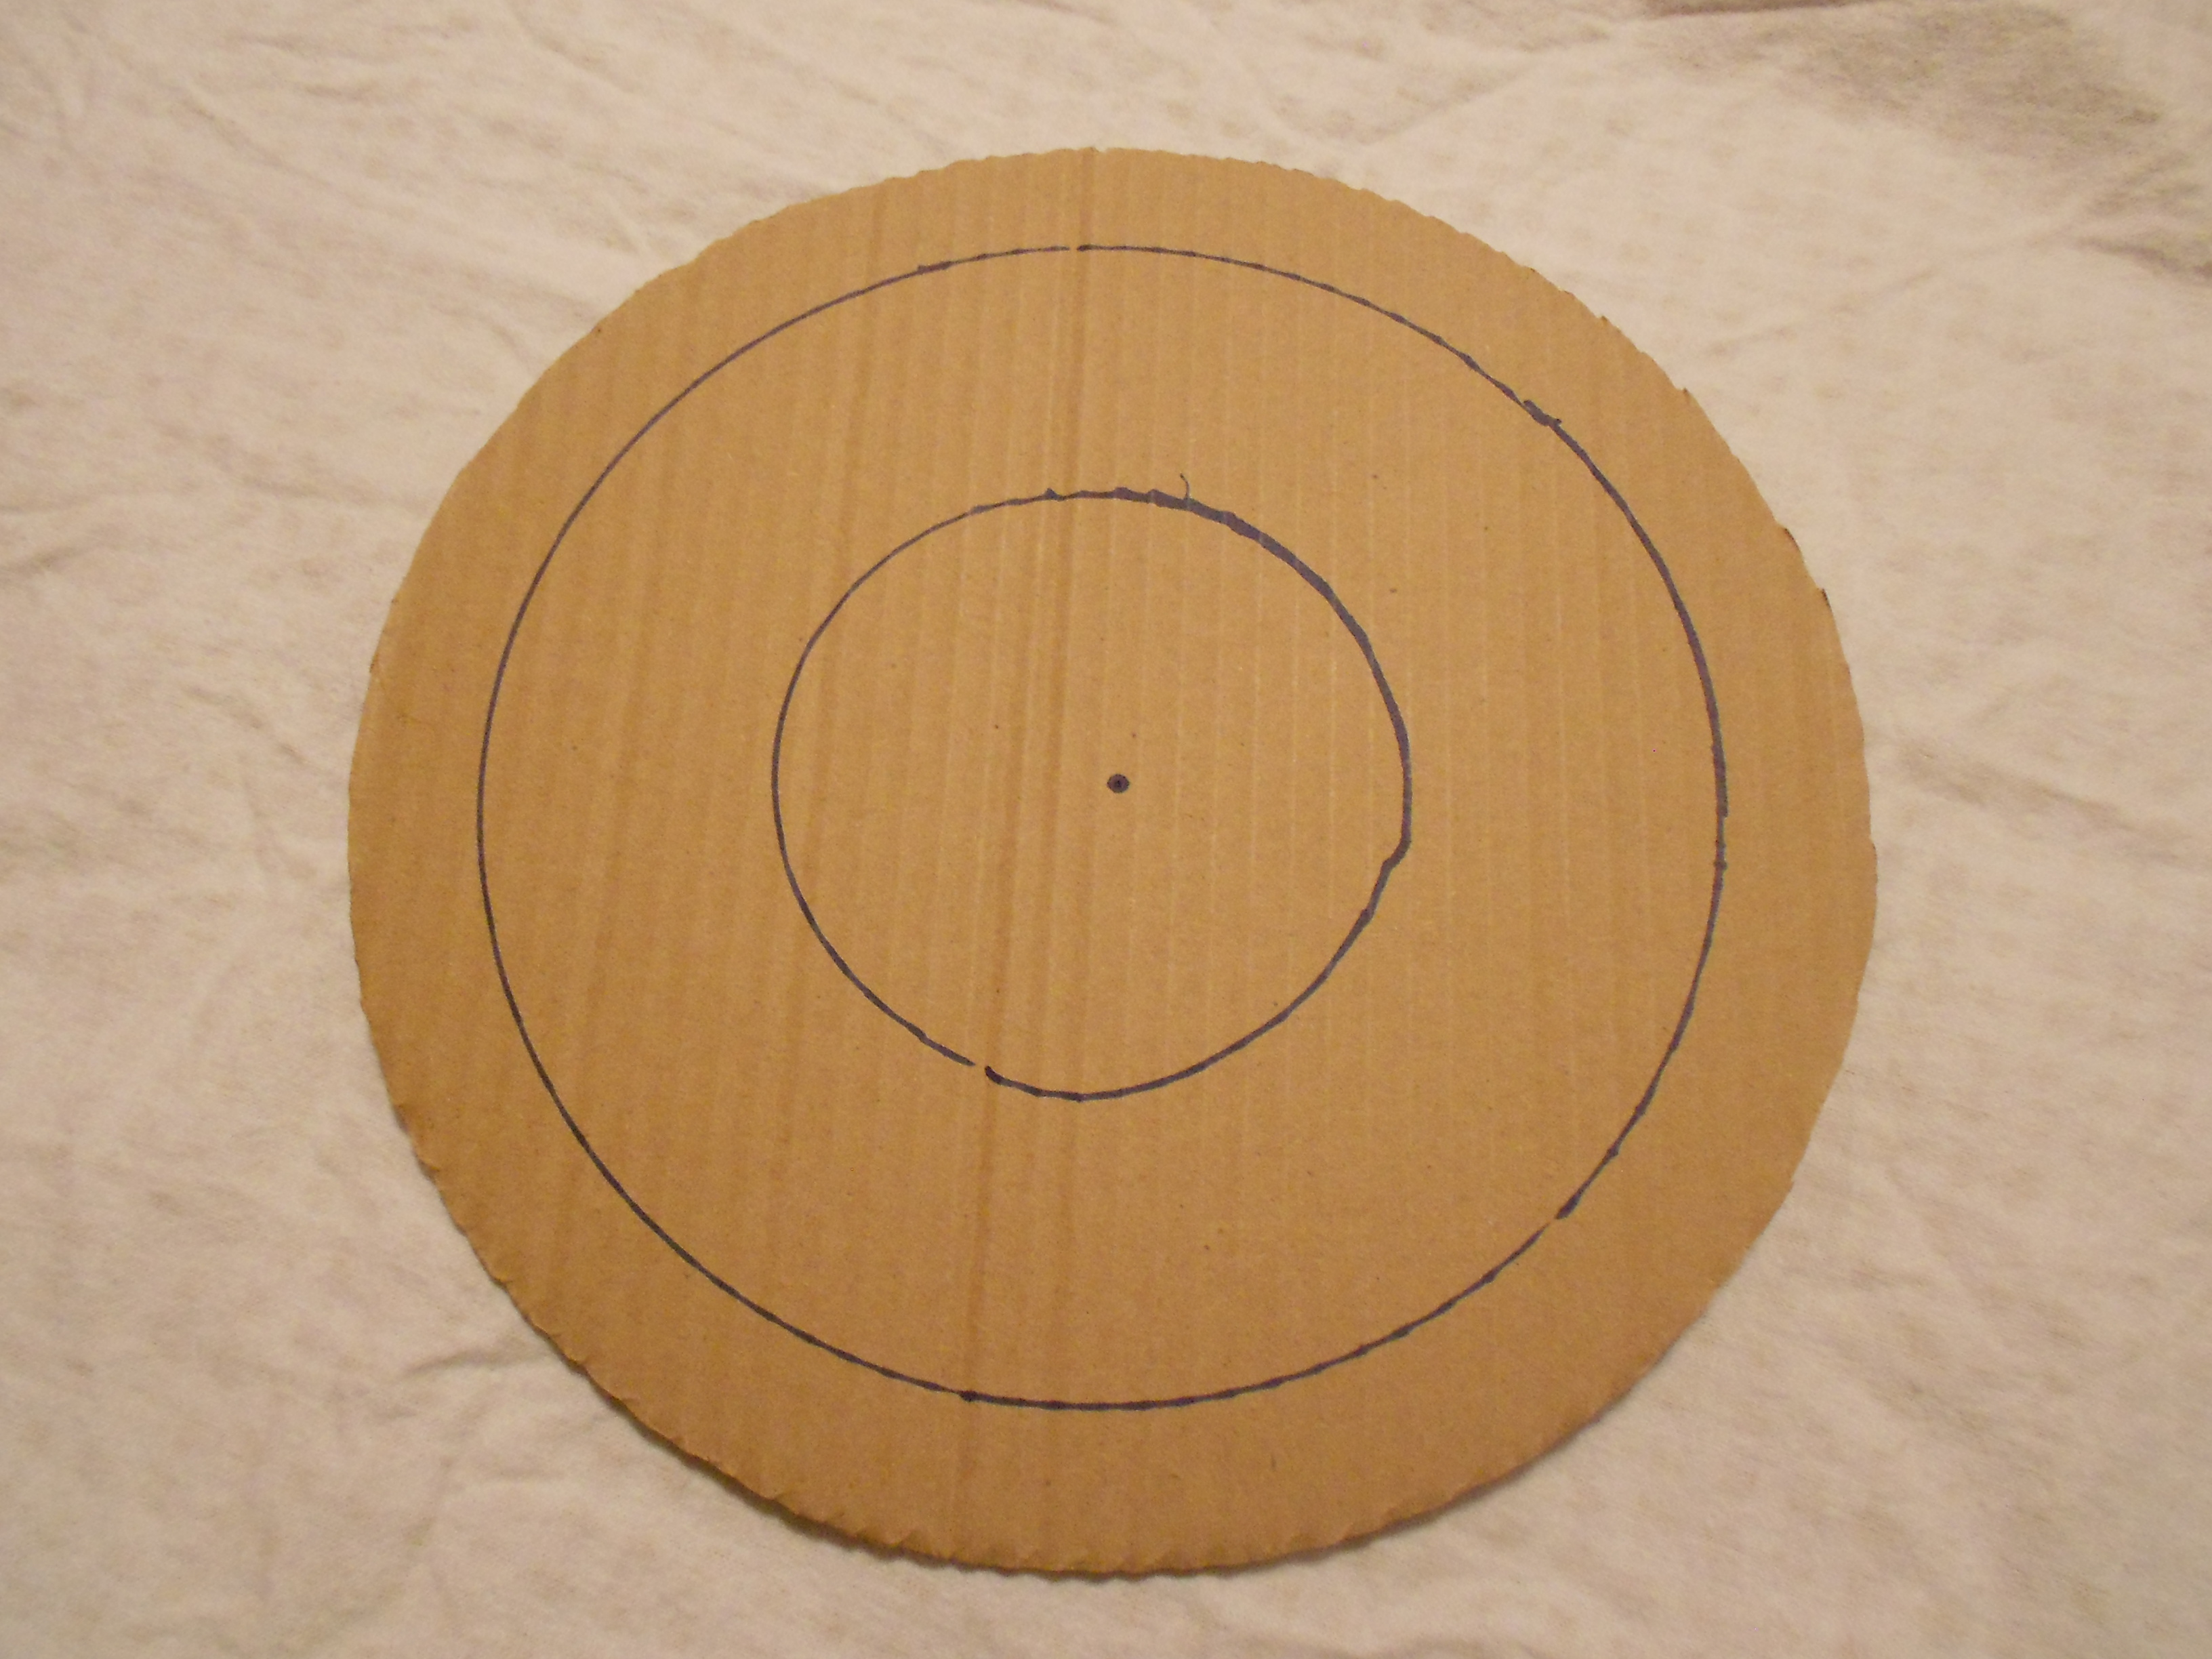
Using a 10″plate (and a pencil) I traced then cut out a circle. Then with my sharpie and the 8″ plate and 4″ bowl, I traced the circles. Try to keep the circles as centered as possible or the cones will be off centered (unless you want it off centered -then it’s ok!). The sharpie lines will help align the cones.

Now for the fun part! Gluing the cones to your cardboard!! (can you tell I was excited?) Starting with the first row of sharpie lines, I glued 4 cones, one at 12 o’clock, 3 o’clock, 6 o’clock and 9 o’clock as pictured above (or if you prefer: North, South, East and West).
Once that’s done, I just glued along the first row of sharpie lines I created and continued until I had no more space left.

I then moved onto the second sharpie line, again until there was no room left.
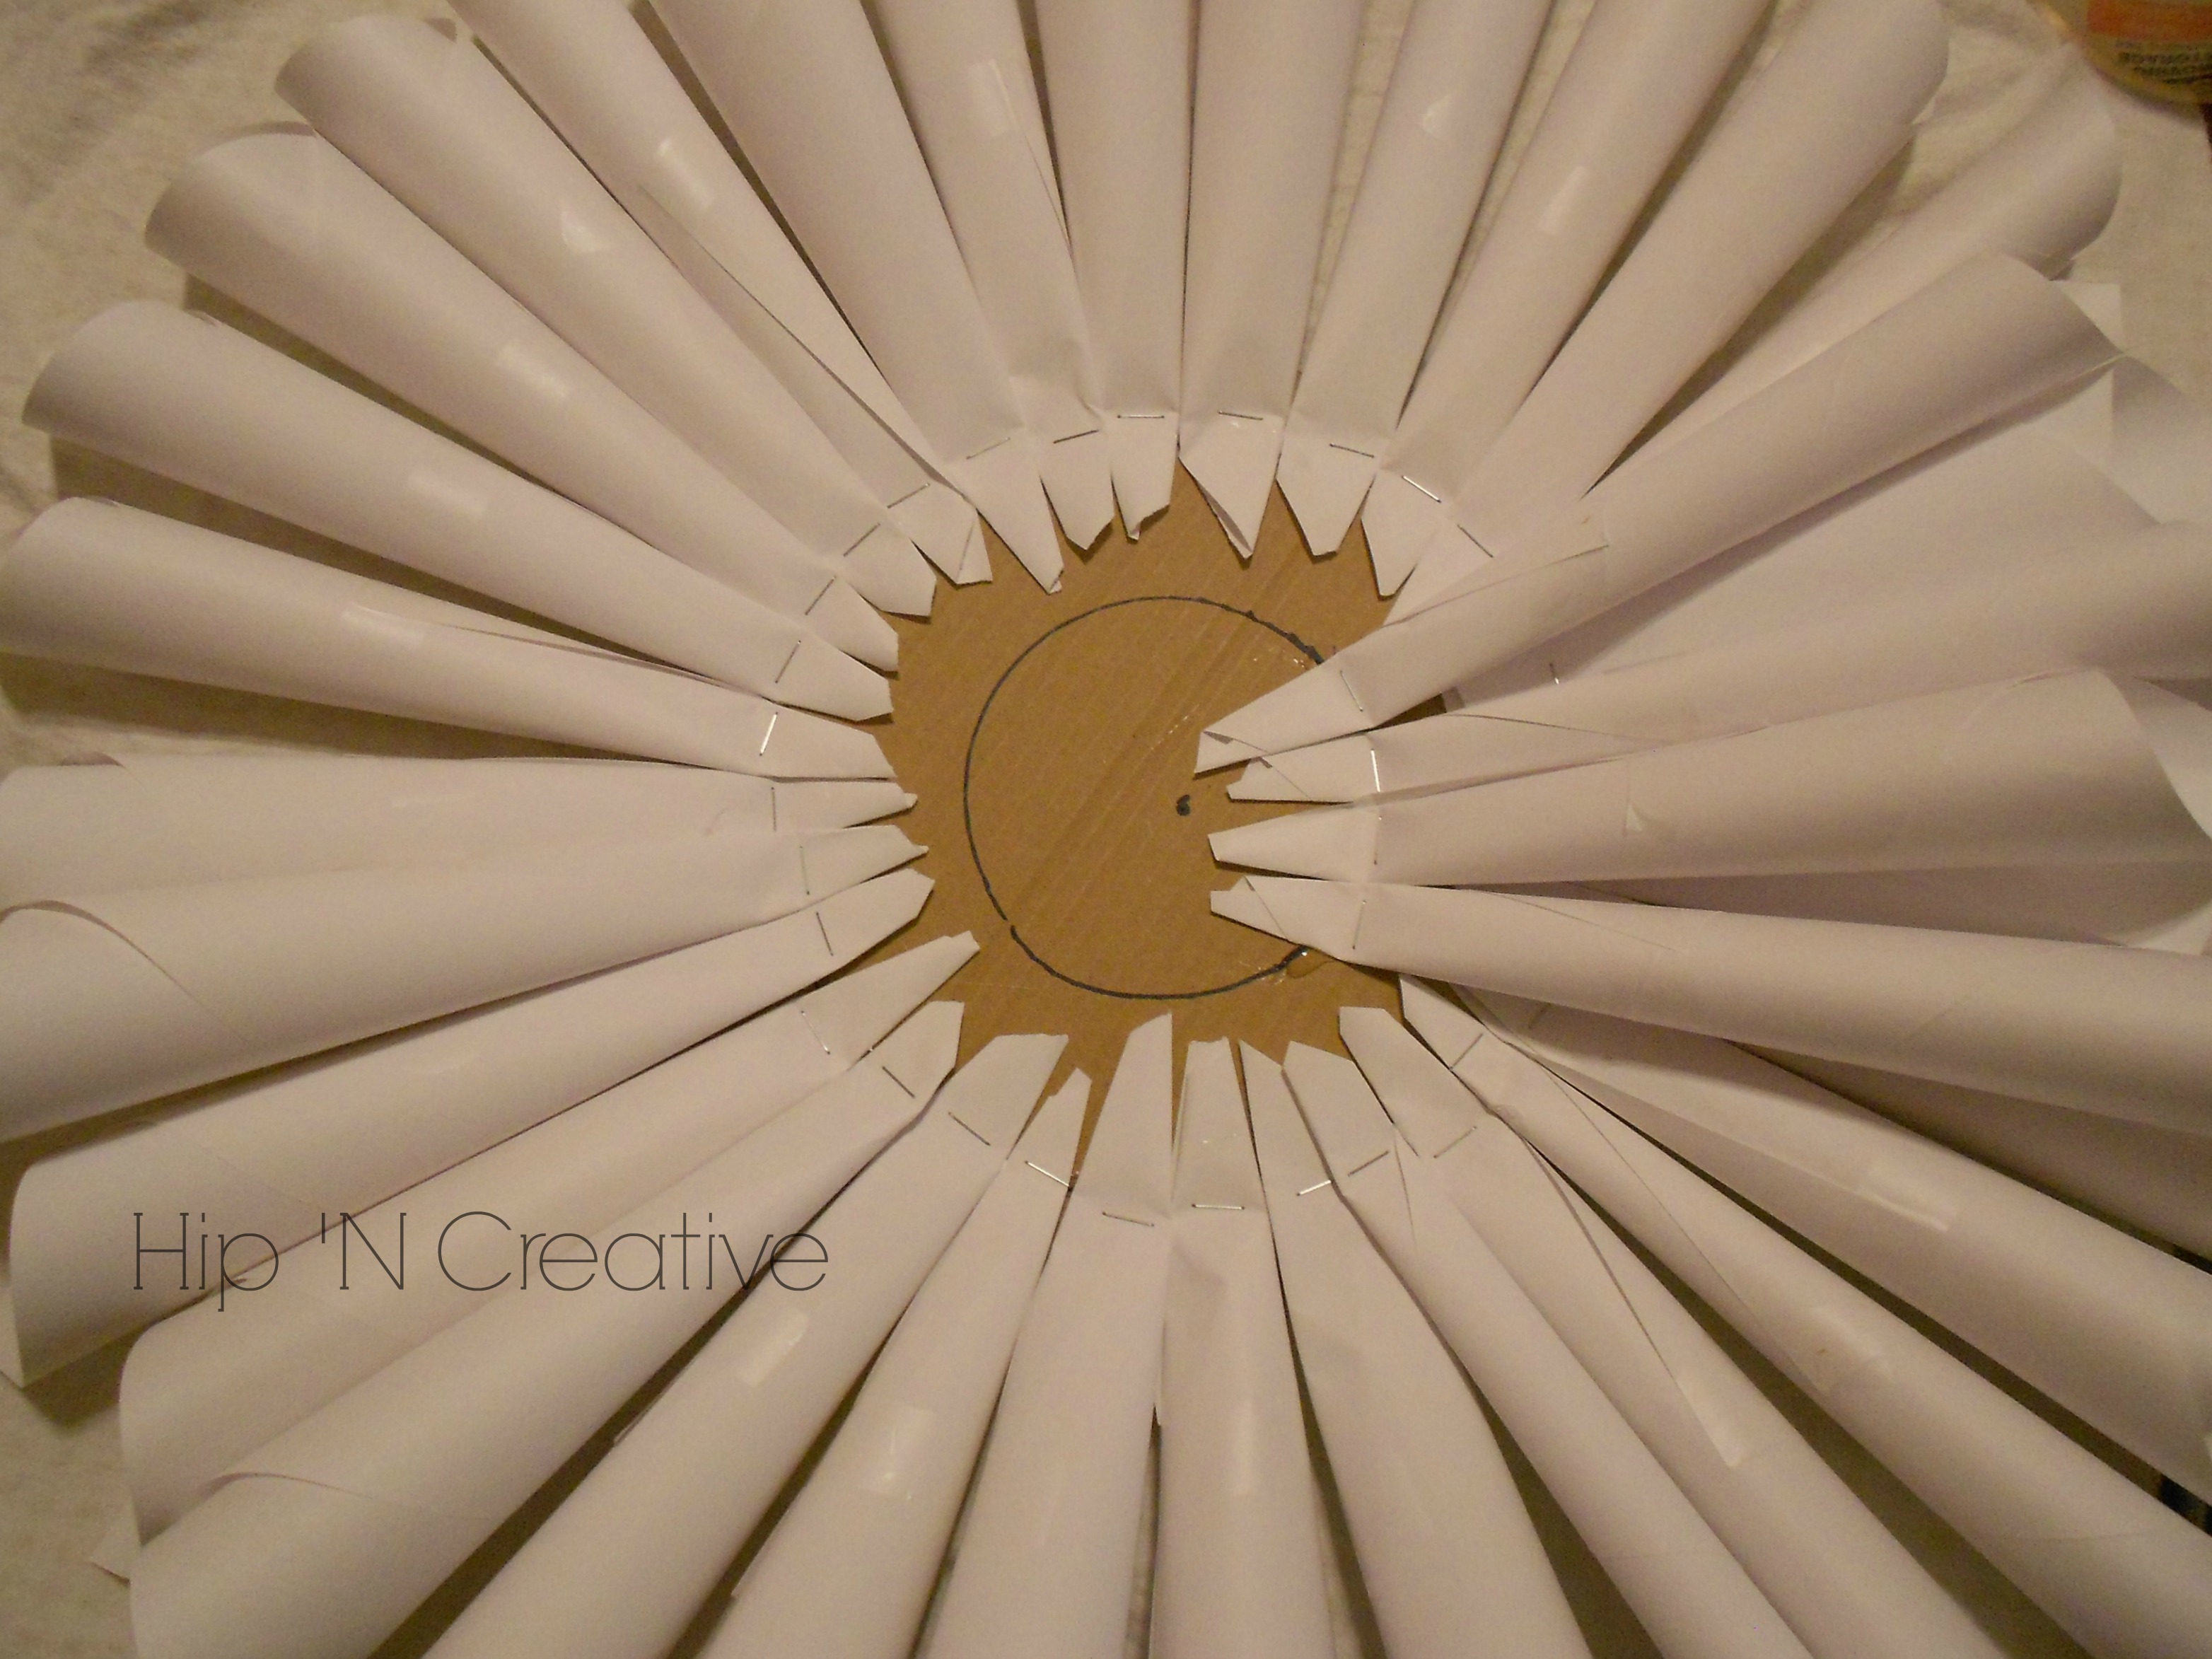
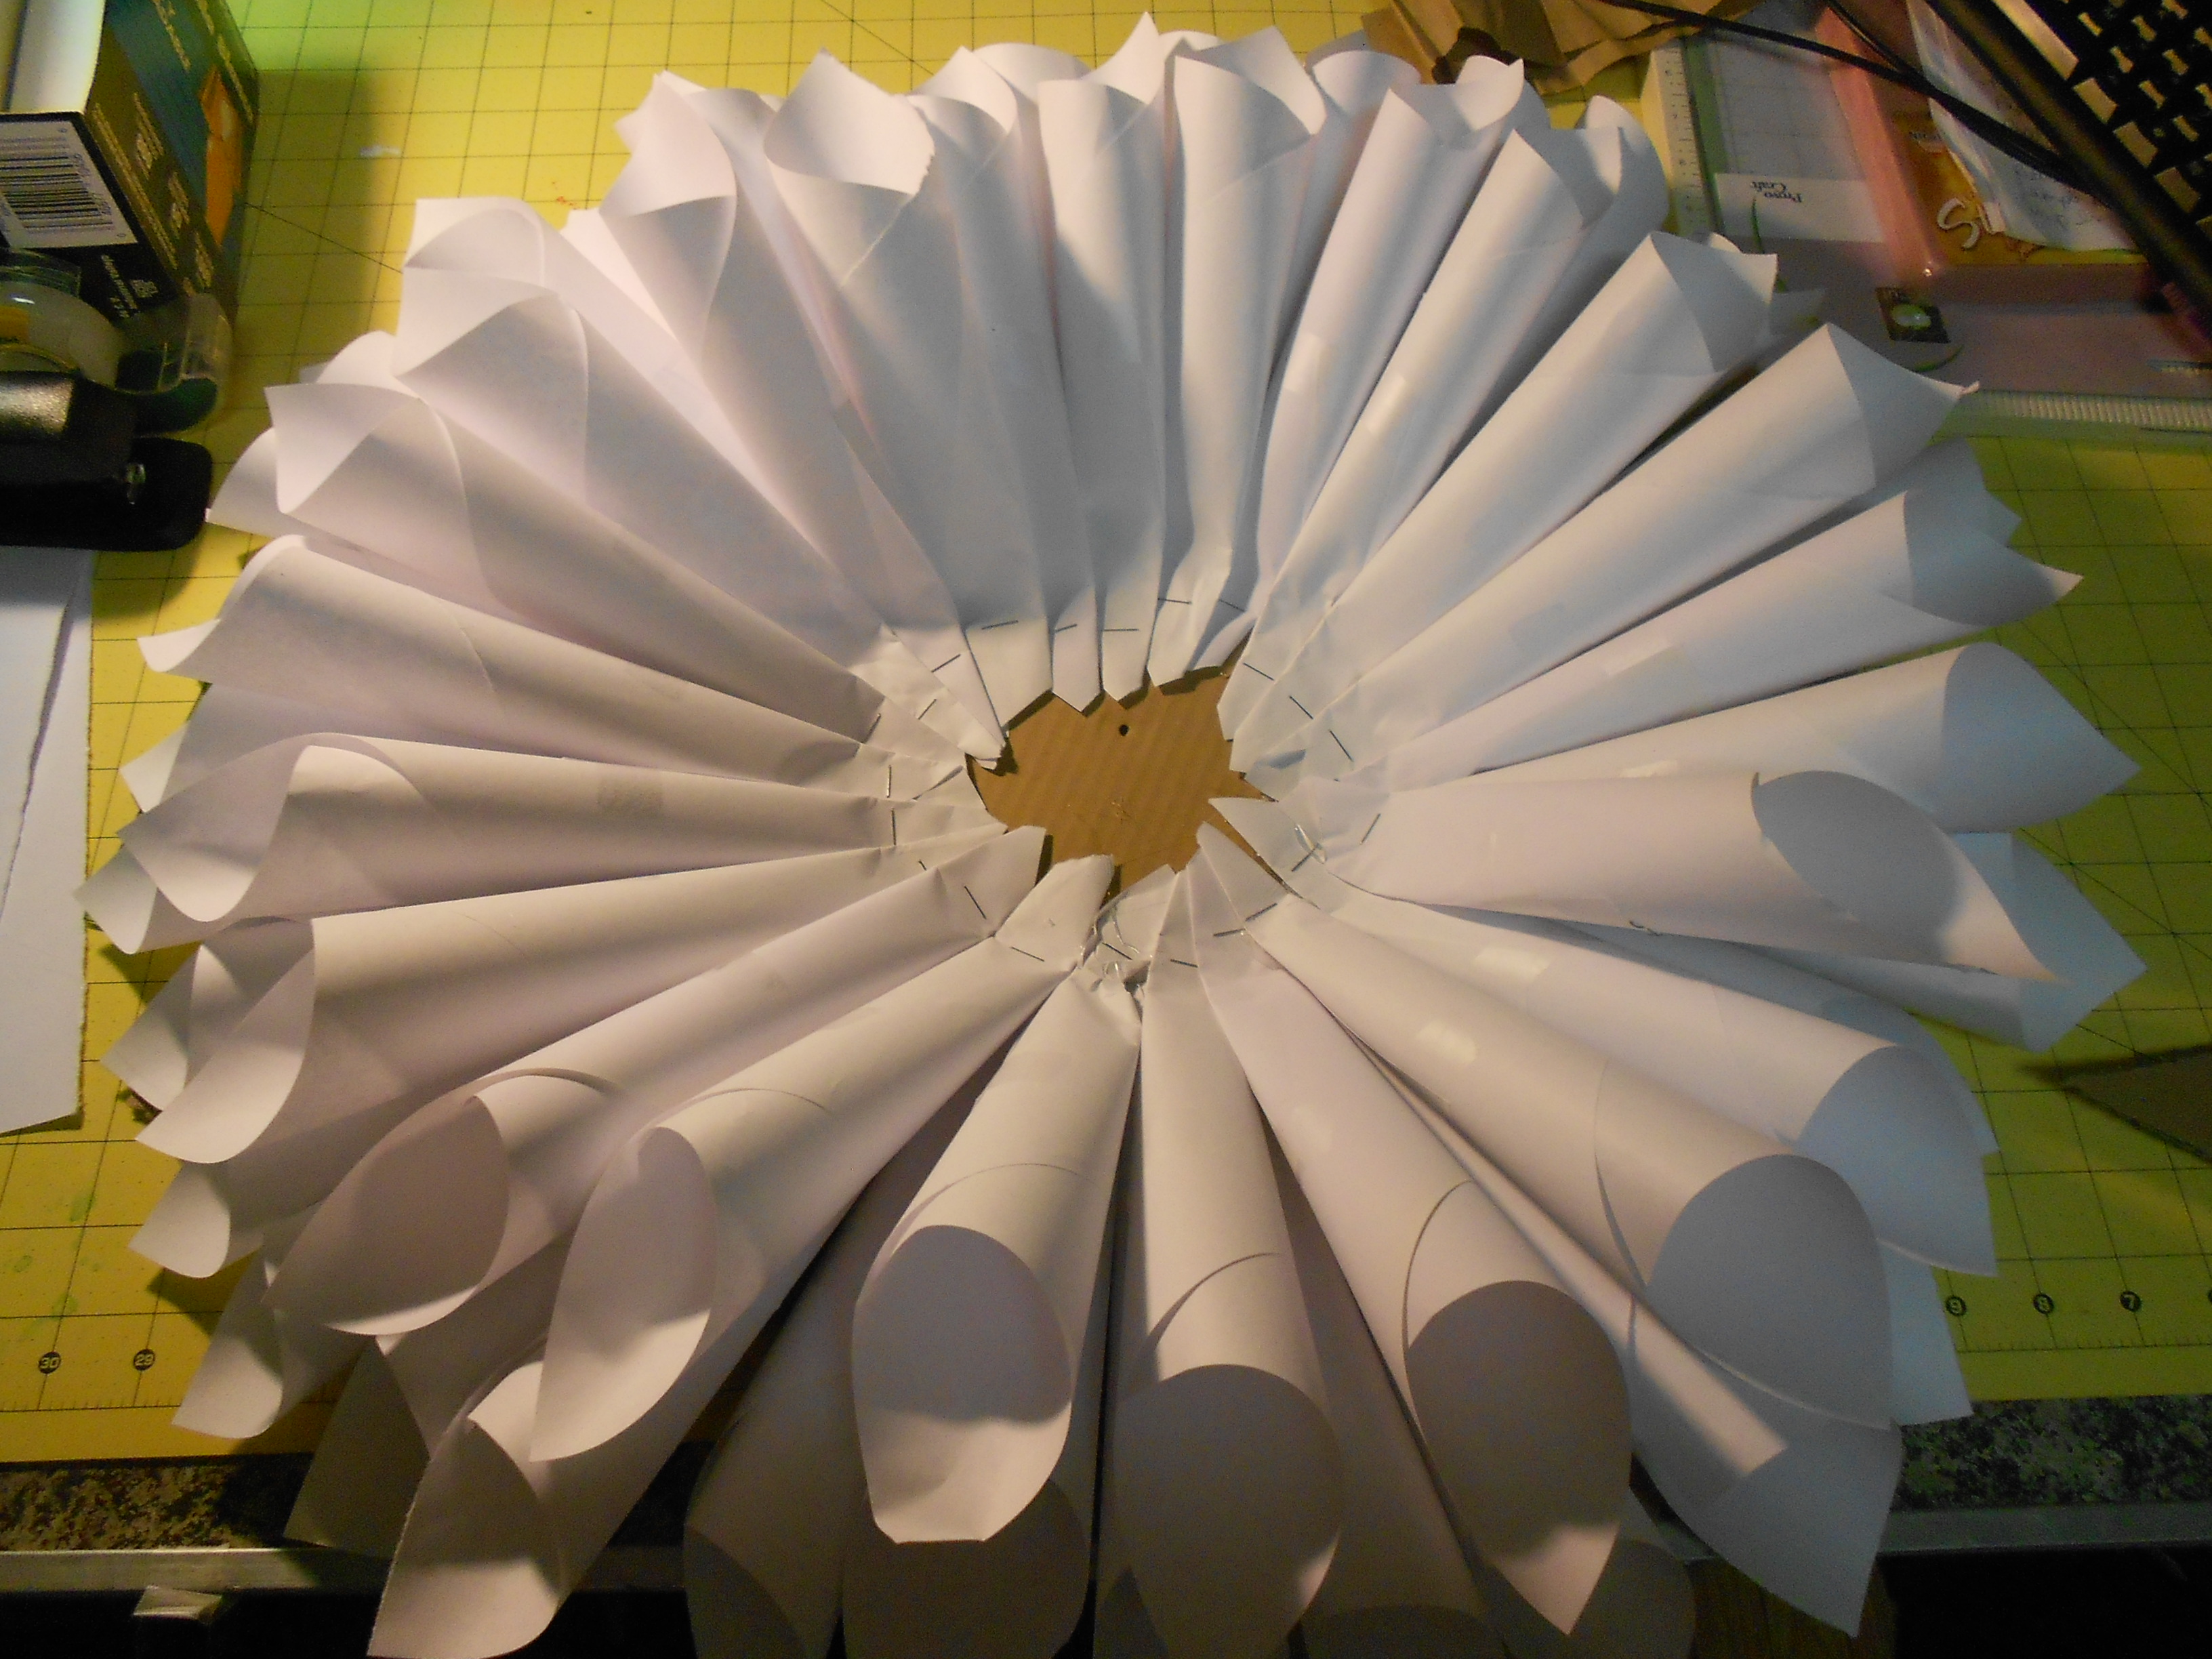
My final row of cones I glued a bit tighter together, leaving enough room in the center to fill with the Christmas Ornaments. 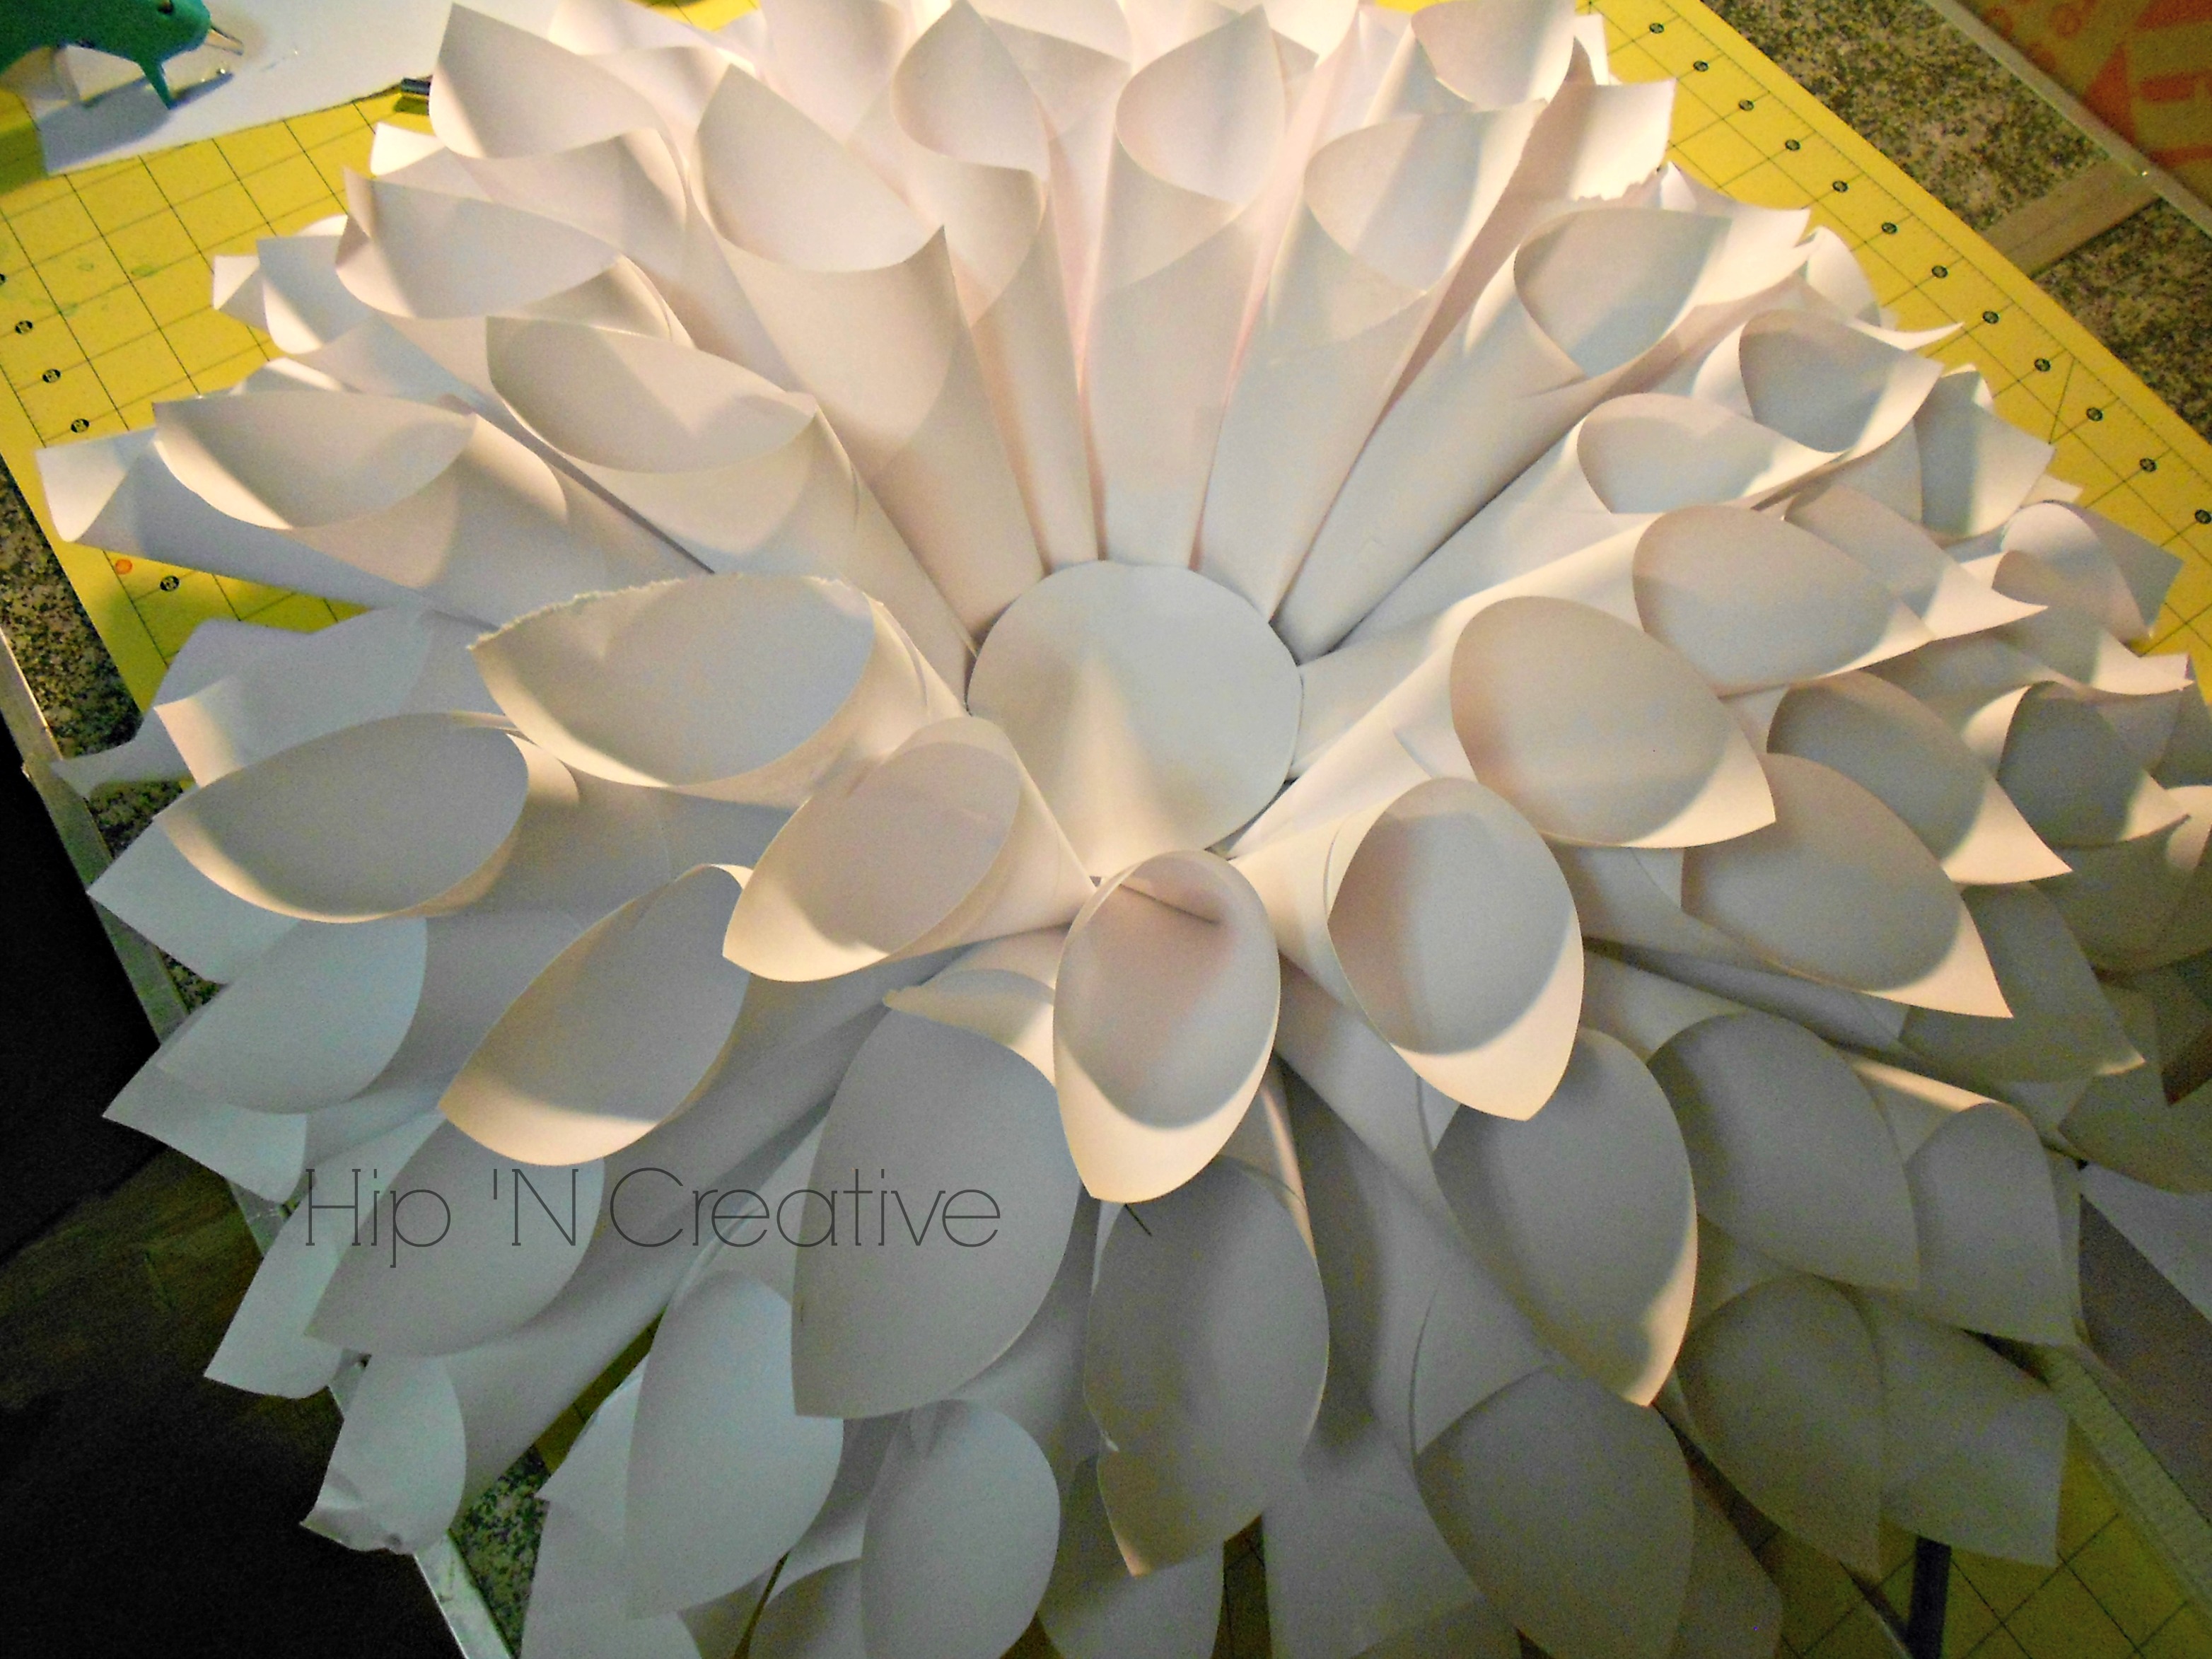 Before I glued my ornaments to the wreath, I quickly cut out a 4″ circle and glued it to the center of the wreath. I just like how it hid any of the “ugly” parts of the wreath’ Making it look nice and neat! When filling my wreath, I used enough glue to adhere the ornaments to the wreath, but not to much that it looked sloppy!


This was such a fun project and I absolutely love how it came out! I definitely consider doing this again and maybe adding a bit more embellishments to the wreath? I do recommend you give it a try! If you do create your own wreath drop me a line and let me know how it went!
What about you? Do you have any suggestions on a project I could try or an awesome project you’re working on and want to share your work? I’d love to year from you! Send me a line anytime!


