Kitchen Renovation Project: Planning and Budgeting

Today I decided to continue our Kitchen Renovation Project series by providing detailed information about our Budget and how we planned it all. As you may have read in our other posts (found here and here) my husband and I were in the process of renovating our Kitchen and I wanted to share our experiences with you and provide enough information for you incase you’re thinking of starting a renovation project as well.
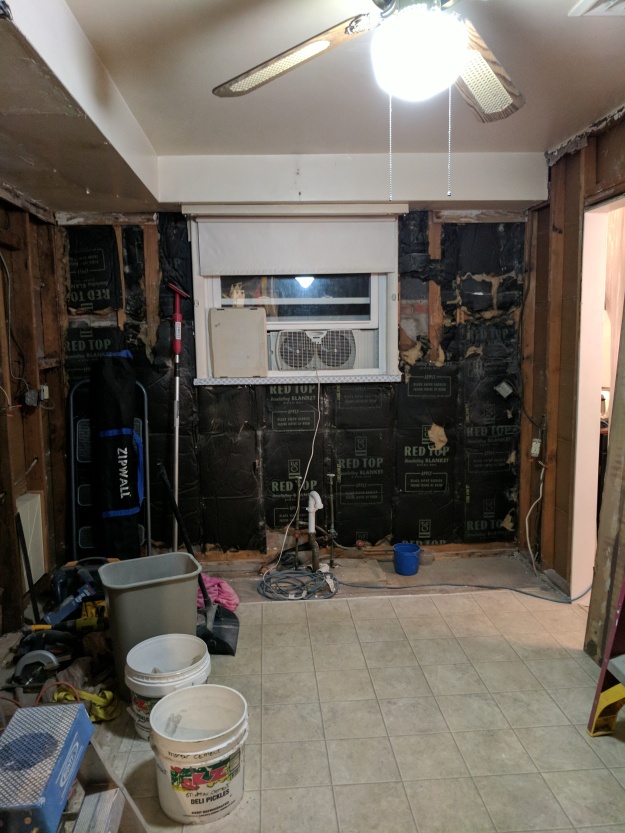
To refresh your memories (or if your new see what we had to work with) Here are some before pics and what we’ve done so far:
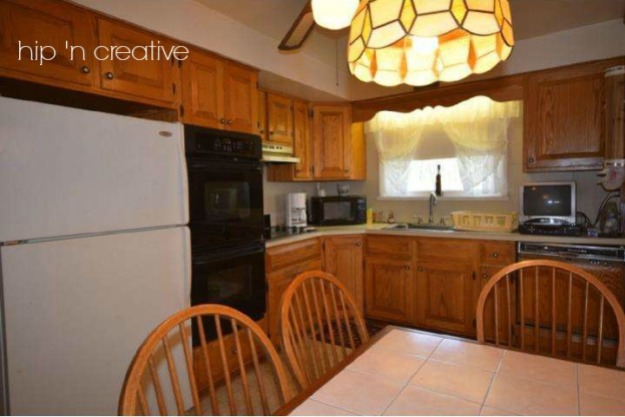
Above is the original photo of the kitchen, as how the previous home owners had it. When we purchased the house four years ago, we didn’t do much to the kitchen except remove the TV and microwave for additional counter space and cleared the counter as best as we could. As you can see from our first photo, we did not have a lot of counter-space, we also lacked any storage and the double oven although nice did take up a large part of the kitchen. We also had issues with our base cabinets, they were broken and my husband had to fix them several times. Our sink also broke twice and the hood range didn’t even work. The air circulated back into the kitchen (we later found out they closed off the vent – why? we’ll never know). Lastly we had hardly any lighting and the space wasn’t set up to it’s full potential.
So we decided to wait until we had some funds available (and the kitchen cabinets to break for the 548539th time) to renovate our kitchen. I have to admit that there was a lot of headaches in this renovation. A lot of late nights and a lot of stress. So if you really want to DIY your own kitchen, here are some tips I want to share with you.
Top 5 DIY Kitchen Renovation Tips
1. DO YOUR RESEARCH
So one of the first thing we did was do a little, a lot of research. We looked everywhere for inspiration, places online like: Pinterest, Houzz, Google Images and Ikea. We also looked at magazines for inspiration, whenever we saw an HGTV show (like Property Brothers) we would take note to look at the kitchen and figure out what we both liked, we even went to Ikea and checked out their floor models. Which was helpful to actually envision how we wanted our kitchen to turn out.
We would talk about what we envisioned for our kitchen. We both wanted something light and bright so we knew dark cabinets were not our style. I initially wanted white cabinets but later after discussing it with my hubby we both agreed that white wasn’t for us. We then settled on neutral colors.
2. CREATING A BUDGET
Creating a budget is very important. Without a clear idea of how and what you spend your money on is critical. You need to first create your budget before you can come up with a design. I find that it doesn’t make sense to design your kitchen only to realize that you don’t have the funds to make that happen. So this is what we did to create our budget.
First thing we did was write down everything we wanted or needed in our kitchen.
- New appliances
- New counter-tops
- New flooring
- Update electric
- New window
- New cabinets
- New backsplash
- New Hardware (drawer pulls and knobs)
- New lighting fixtures
- Paint
- miscellaneous expenses
(*you will also need permits from your township for any projects you take on. Some areas are strict about their laws and you need to proceed safely when doing so.)
Next we went online to Home Depot, Lowes, Etc. and figured out a rough estimate of costs for everything: like flooring, backsplash, countertops, appliances, everything except our electric. Doing this helped us out a lot because we now had an idea as to how much everything will cost us, giving us our truer estimate of expenses. Once we did the math we also added a small buffer for any unexpected expenses that may occur. A good idea is to add about 10 -15% to your budget. So if your budget is $10K then a good buffer would be $1000 – $1500. This will help out a lot and if you don’t go over budget you can use the savings towards any future expenses, reno projects or vacation!
I will be sharing a future post detailing our expenses, what we got and a cost breakdown as well, so subscribe to my blog if you haven’t so you don’t miss a thing!

3. DECIDE ON DESIGN
Once we figured out our budget, my husband took detailed measurements of our space and we got to work. It is very important to measure your space so you have an accurate as possible measurement for your cabinets and fixtures. That’s something I learned and am glad we did before we ordered our cabinets and counter-tops. This helped us have a more accurate budget as well.
We initially went old-school and drew a rough draft of our kitchen floor plan. Then my husband Harvey found a program that we used to get a better layout.
If you are interested in design software to help you get an idea of layout and spacing. There are several FREE options out there, Lowe’s Virtual Room Designer, Ikea Kitchen Designer as well as others. You can always google “virtual room designer” and get many options.
4. CREATE A TIME FRAME
Last but not least is your time frame. When Harvey and I talked about our renovation project, we knew from passed experience that we needed a realistic time frame and some buffer time. Since this was a huge project we were undertaking, we figured a three month time frame would be good. This was what we were figured would be enough time because we were doing most of the project ourselves (with help from my Father in law). Since this was going to be done after Harvey got home from work and on weekends we knew three months was our realistic time frame. We also took into account some emergency time like sick kids, or injuries, overtime at work or a needed break so we wouldn’t burn out.
5. HAVE PATIENCE
Remember friends this is real life and not a TV show where everything is done in a matter of days. Us regular folks have too many variables to rely on a small time line and as we know TV shows have a crew that do most of the work behind the scenes. This is also true if you are hiring someone to do part (or all) of the job. Things happen and you need to roll with the punches – boy did we learn that! I thought a three month time line was realistic but unfortunately for us we had one too many road blocks and our three month window was more like 5 months but more on that in the future.
Well guys I hope you enjoyed this post and I gave you some good tips for your project. If you have any questions, please make sure to ask in the comments below as well as share any tips you may have. All is appreciated. Until next time friends, I hope you all have a wonderful day!
Make sure you head over to my YouTube channel & Instagram and subscribe there for weekly motivational homemaking videos, DIY inspiration & an amazing community! Love you guys!!
XO,
Awilda


